One thing I forgot to show you earlier is how to install Z-Wave devices into your house. In this post I’ll install a dimmer module in the bedroom, which will be part of the wake up light.
Materials used
The materials I’m going to use are the following:
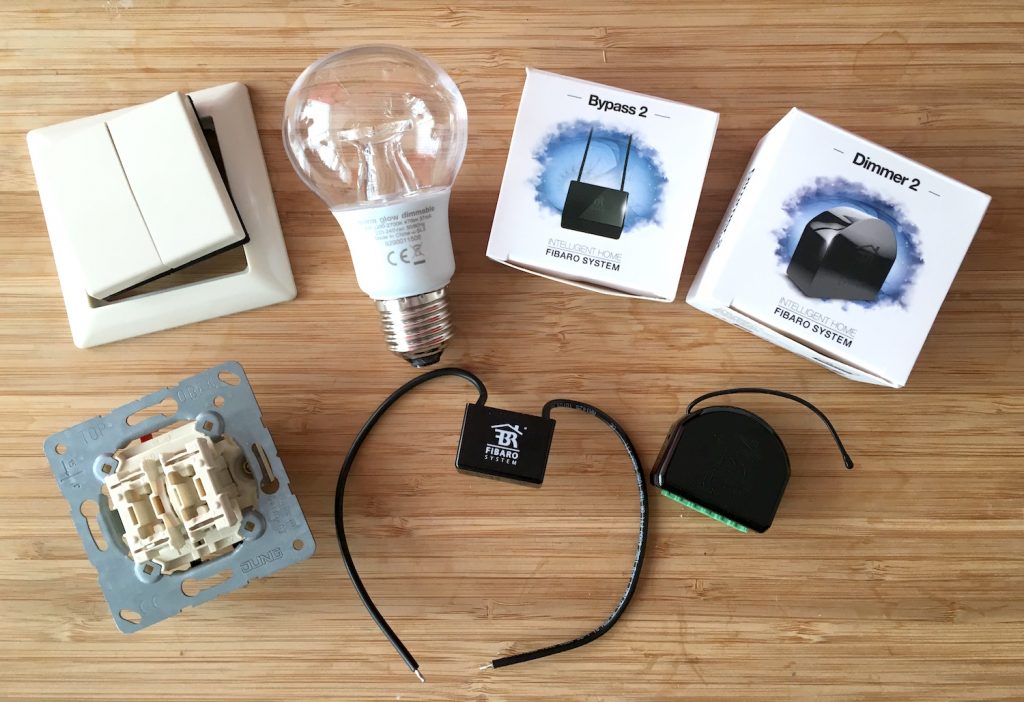
- Fibaro Dimmer 2 – the actual Z-Wave dimmer
- Fibaro Bypass 2 – needed when using LED lights
- Philips Dimmable LED – 6W/470lm (comparable to 40W), warm white
- Jung 535 EU – 2 push buttons
- Some electrical wire
Installing the dimmer step-by-step
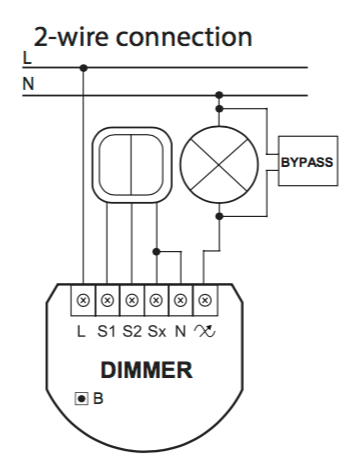
Now we have all materials, let’s start the installation. There are two possibilities to connect the dimmer, depending if you have 2 or 3 wires available. In our case we just have 2 wires available behind the outlets, so we’ll have to consider the following wiring diagram:
We’ll go through the installation step-by-step.
0. Cut the power
For your own safety always cut the power when working on your lights. Find out in which group your light is placed and disable the power for this group.
1. Prepare the dimmer
Prepare the dimmer and push buttons by connecting them together. It’s best to do this now, as while you’re not working on the wall yet you have plenty of room.
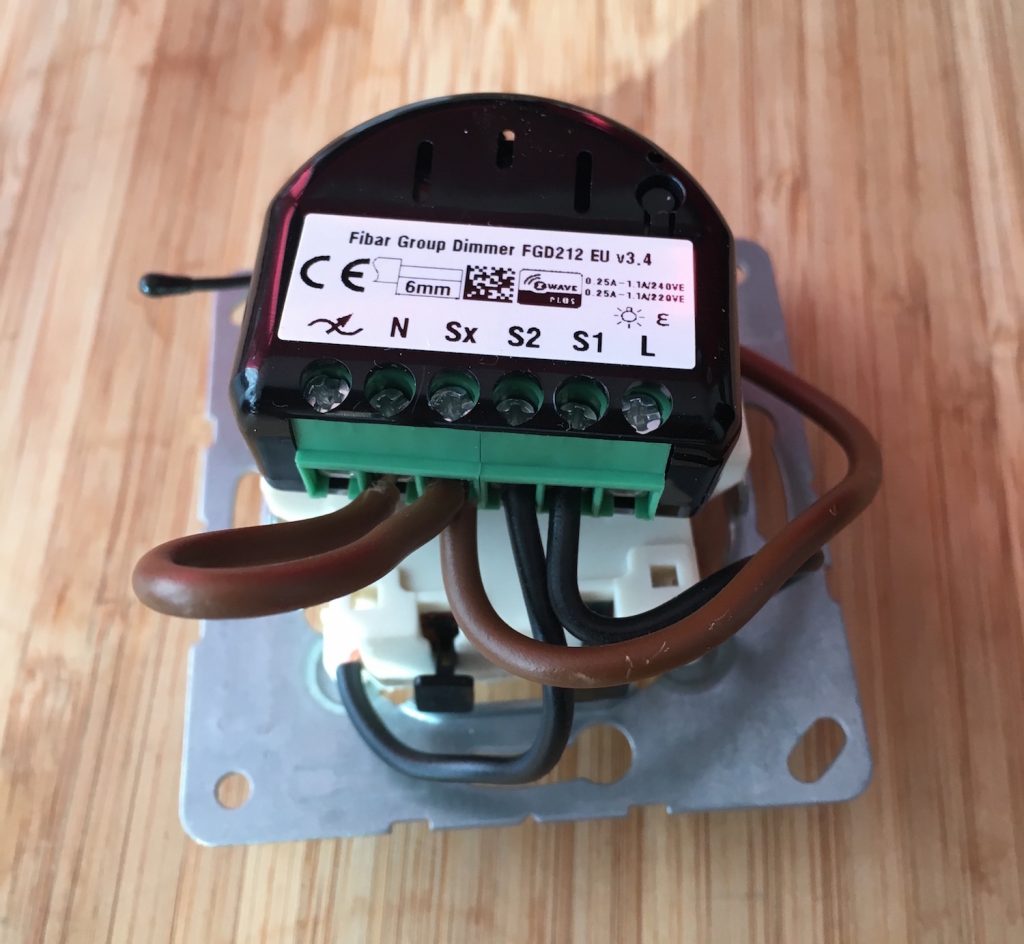
2. Install the dimmer
Now install the dimmer and buttons in place and connect the live and switch wires. Push everything inside to check if it fits, but don’t close it with screws yet.

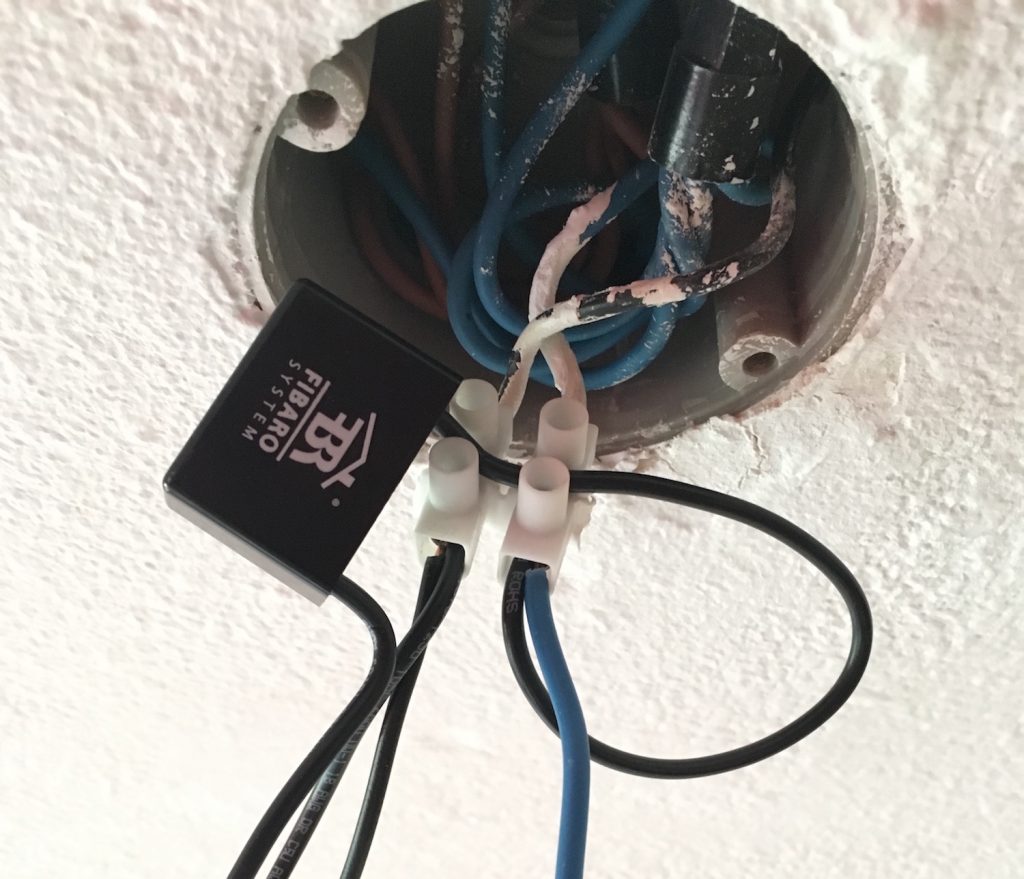
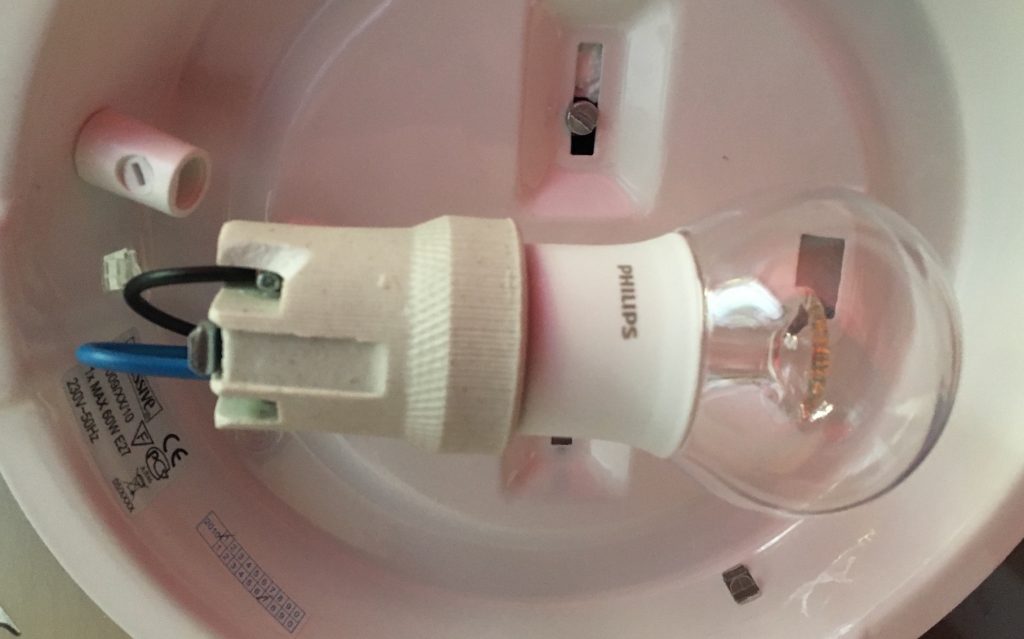
3. Install the bypass
As we’re using a LED light bulb we need to use a bypass. This makes it possible for the dimmer to function on low loads. It’s best to install the bypass close to the light itself, so we’ll install it above the light. (in my case this is also the only place where it fits, as space behind the buttons is very tight)
Installation is easy as you just have to connect both ends to either side of the bulb (direction doesn’t matter). Here I’m using a screw terminal. The black and blue wires will go to the light itself.
4. Connect the light
Now connect the light itself and screw in a light bulb.
5. Include the light in Z-Way
The wiring is ready. You can now enable the power again. To use the light we have to add it to the Z-Wave controller: Z-Way. For this you go to http://server-ip:8083 and then move to Settings > Devices. Here you click the Add new button. Click the Start inclusion button. You’re controller is now in inclusion mode. To include the new dimmer you have to activate it; for this dimmer you can triple click the button connected to S1.
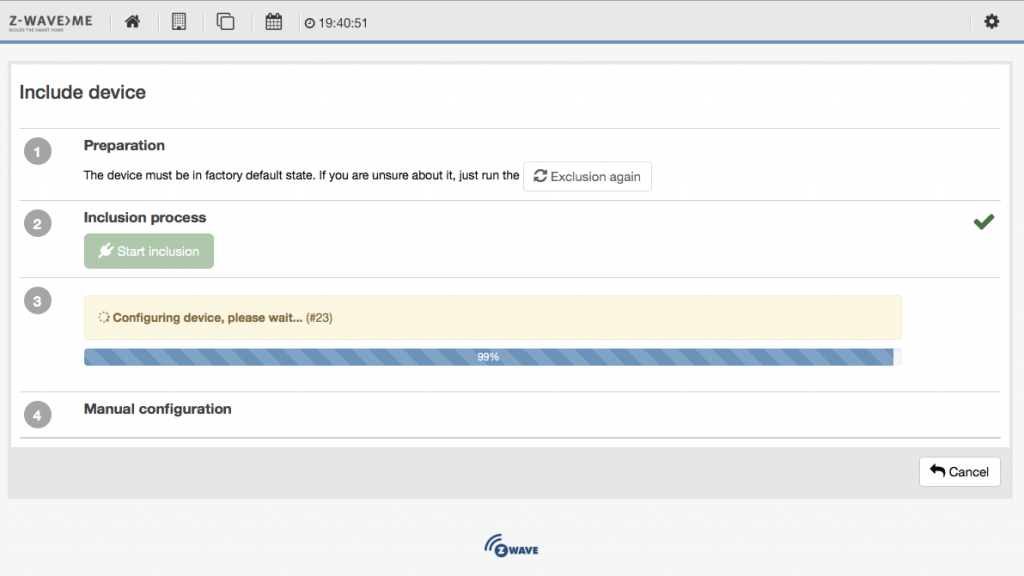
After a while inclusion should be finished and you can test the light!
In my case the interview part of the inclusion could not finish successfully. This is a known problem with this dimmer and Z-Way and hopefully will be fixed soon. The basic features of the device are luckily working as they are supposed to.
6. Test!
And there was light:
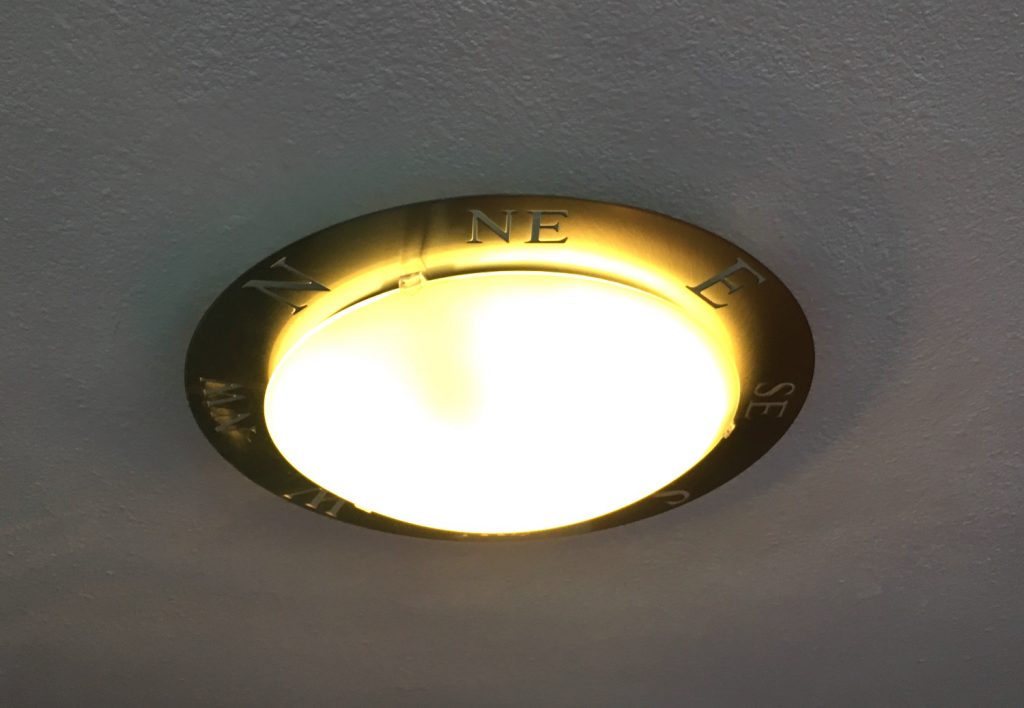
By clicking the S1 button you can turn on and off the light. By holding it you can dim it. A nice surprise was that this is the first combination of dimmer/LED which doesn’t make any noise while dimming!
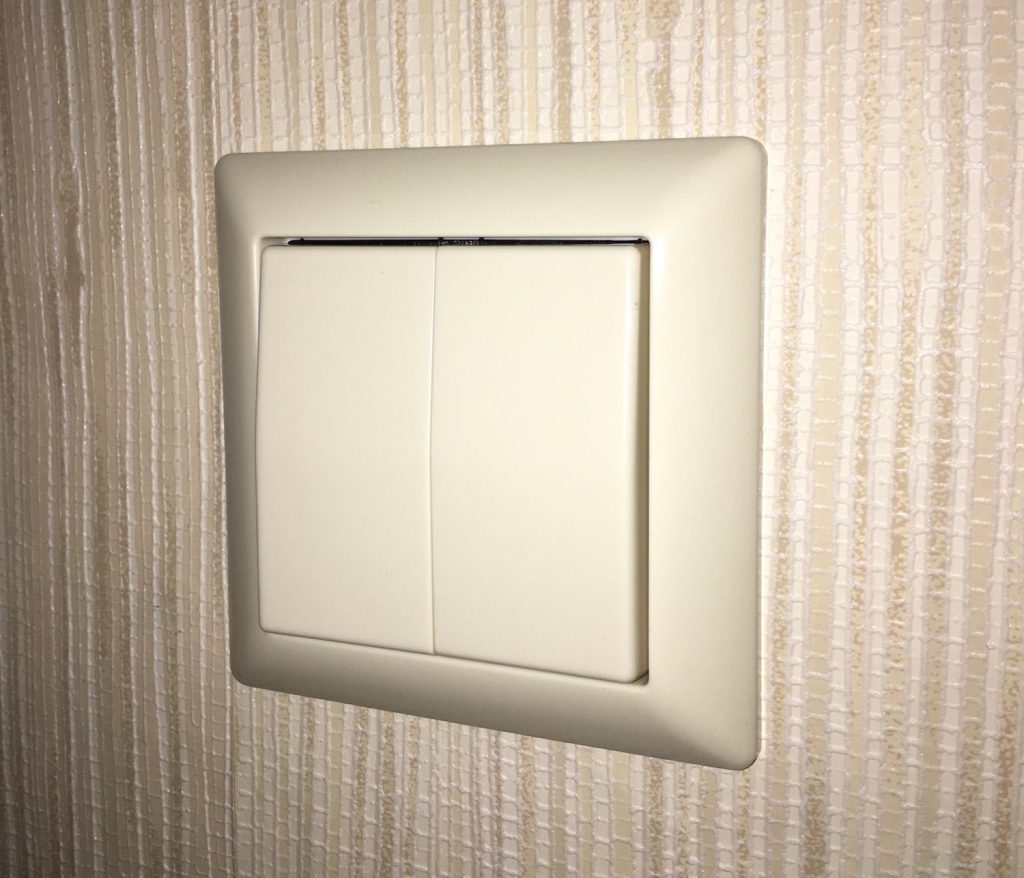
7. Finish up the buttons
Now that we verified the light works, the only thing left is finishing up the buttons. Screw it on its place and click the buttons in their socket.
Add the new light to Thuis
The physical part is done, but we of course want to use the light within Thuis. For this we have to do a few steps as well. As described in Publishing activity from Z-Way to MQTT we name the device and add it to a room. We also add the tag mqtt as that’s how I configured the MQTT app for Z-Way. The light is now controllable through MQTT.
Next is to add it on the Java side in the Core. This is described in Core v2: A Java EE application. We add the device by adding a line to the Devices class:
public class Devices {
	public static MqttDimmer bedroomMain = new MqttDimmer(bedroom, "main");
}
The bedroom light is now ready to be used in any rules, or to be controlled from other devices as the iOS app.