In Final implementation UI design you saw our Thuis iOS app, which has a few buttons for controlling the Home Theater. In this post we’ll make sure they work well. For brevity I will describe only the main scene: it makes sure we can watch anything on the Apple TV.
Defining devices
Before we can use any devices in Thuis we have to define them. You might remember from Core v2: A Java EE application that we have a class Devices containing static definitions. Here we will add the devices we need for the home theater system:
package nl.edubits.thuis.server.devices;

public class Devices {
	public static Computer NAS = new Computer(none, "nas", "nas.local", "admin", "00:22:3F:AA:26:65");
	public static AppleTV appleTv = new AppleTV(livingRoomHomeTheater, "appleTv", "10.0.0.30");
	public static HomeTheater homeTheater = new HomeTheater(livingRoomHomeTheater, "homeTheater");
	public static MqttSwitch tv = new MqttSwitch(livingRoomHomeTheater, "tv");
	public static Receiver denon = new Receiver(livingRoomHomeTheater, "denon", "10.0.0.8");
	public static MqttSwitch homeTheaterTv = new MqttSwitch(livingRoomHomeTheater, "tvSwitch");
	public static MqttSwitch homeTheaterDenon = new MqttSwitch(livingRoomHomeTheater, "denonSwitch");
}
The bottom 2 are Z-Wave outlets, which you’ve seen before. All the others are new types of devices. Below we’ll describe each of them separately.
TV
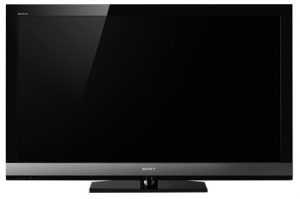 Let’s start with the easiest device: the television. With the work we did yesterday in Home Theater part 1: CEC we can turn the TV on and off by sending a simple MQTT message. Because of that it’s defined as a
 MqttSwitch.
Apple TV
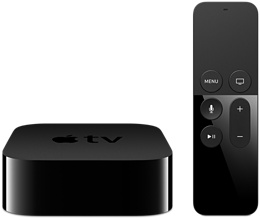 The Apple TV is a great device as the centre of the home theatre. It is able to control other devices through CEC, but unfortunately you can’t control it yourself through CEC. So I had to look for an alternative and I found it in AirPlay. Xyrion describes it well how you can wake up an Apple TV by connecting to it using Telnet and telling it to play some bogus video.
In Java we can do this by using a Socket. For this we’ll create a new Command, the SocketCommand:
package nl.edubits.thuis.server.automation.commands;

public class SocketCommand implements Command {
	String hostname;
	int port;
	String body;

	public SocketCommand(String hostname, int port, String body) {
		// ...
	}

	@Override
	public Message runSingle() {
		try (
				Socket socket = new Socket(hostname, 7000);
				PrintWriter out = new PrintWriter(socket.getOutputStream(), true);
				BufferedReader in = new BufferedReader(new InputStreamReader(socket.getInputStream()));
		) {
			out.print(body);
			out.flush();

			logger.info("Socket response: " + in.readLine());
		} catch (IOException e) {
			logger.log(Level.WARNING, "Socket failed", e);
		}

		return null;
	}
}
We use this command in the definition of the AppleTV itself. By extending MqttSwitch we can leverage the logic for updating its status from MQTT. I’m not entirely sure how we can turn off the Apple TV programmatically, so this method is not implemented yet.
package nl.edubits.thuis.server.devices;

public class AppleTV extends MqttSwitch implements Switch {
	String hostname;

	public AppleTV(Room room, String id, String hostname) {
		// ...
	}

	@Override
	public Command on() {
		return new SocketCommand(hostname, 7000, "POST /play HTTP/1.1\n" +
				"Content-Length: 65\n" +
				"User-Agent: MediaControl/1.0\n" +
				"\n" +
				"Content-Location: http://example.org/test.mp4\n" +
				"Start-Position: 0\n" +
				"\n");
	}

	@Override
	public Command off() {
		// TODO
	}
}
Receiver
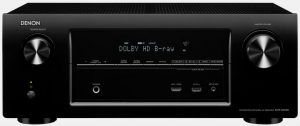 My AV receiver is Denon AVR-X2000. CEC support on this device is limited, but luckily there is an API. Unfortunately, the API is not documented, but by using the web interface I could reverse engineer it. While it’s starting up there are some quirks though as it can take quite a while before the Denon is reachable through the API (while it already works by manually pressing the power button). Because of this we’ll use a combination of both CEC and the API.
Firstly lets create the Receiver class itself. It’s a implementation of MqttSwitch, so the CEC part is easily taken care of. We do override the on() method to make sure it’s only fired when needed as this command toggles the power status for the Denon. To get more detailed information on the status and to change volume and inputs we use the API. The API calls are performed by a DenonCommand.
package nl.edubits.thuis.server.devices;

public class Receiver extends MqttSwitch implements Device, Switch, Singable {
	private final String hostname;
	private Status status;
	private NowPlaying nowPlaying;

	public Receiver(Room room, String id, String hostname) {
		// ...
	}

	public boolean isFullyOn() {
		return isOn() && (status == null || status.getZonePower());
	}

	public boolean isFullyOff() {
		return !isOn() && (status == null || !status.getZonePower());
	}

	@Override
	public Command on() {
		if (!isOn()) {
			return super.on();
		}
		return null;
	}

	public DenonCommand volume(double value) {
		value = Math.max(0, Math.min(98, value));
		String volume = (value==0) ? "--" : String.format("%.1f", value-80);
		return new DenonCommand(this, "PutMasterVolumeSet", volume);
	}

	public DenonCommand input(Input input) {
		return new DenonCommand(this, "PutZone_InputFunction", input.getValue());
	}
}
Due to the time limitations I won’t go into the implementation of the API in this post. If you would like to find out more details about this topic, there is a valuable article by Open Remote describing the key possibilities.
NAS
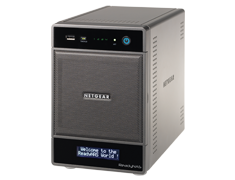 The NAS runs the Plex Media Server. When nobody is home, the NAS is not used and is turned off by default. The NAS supports Wake-on-LAN (WOL), so we can use this to awake it to make Plex available.
For WOL I use a nice little library and built a command around it:
package nl.edubits.thuis.server.automation.commands;

public class WakeOnLanCommand implements Command {
	Computer computer;

	public WakeOnLanCommand(Computer computer) {
		// ...
	}

	@Override
	public Message runSingle() {
		try {
			for (int i = 0; i < 5; i++) {
				WakeOnLan.wake(computer.getMAC());
			}
			return new Message(String.format("Thuis/computer/%s", computer.getId()), "wake");
		} catch (IOException | DecoderException e) {
			logger.log(Level.WARNING, String.format("Waking up '%s' failed", computer.getId()), e);
		}
		return null;
	}
}
As the Computer class used for the NAS is just a basic implementation of an Actuator using the WakeOnLanCommand for the wake() method, I would not present the source code here.
Scenes
Now when we almost have all the devices set up we can combine them in scenes. Let’s start with some code:
public static Scene homeTheaterBase = new Scene("homeTheaterBase",
	asList(
		highPriority(homeTheaterDenon.on()),
		waitForOn(denon.on(), homeTheaterDenon)
	),
	asList(
		denon.off(),
		waitForFullyOff(homeTheaterDenon.off(), denon)
	)
);

public static Scene homeTheater = new Scene("homeTheater",
	asList(
		highPriority(NAS.wake()),
		homeTheaterTv.on(),
		illuminanceIsLowerOrEqual(livingMoodTop.on(), 70l),
		waitForOn(Devices.tv.on(), homeTheaterTv),
		waitForOn(appleTv.on(), denon),
		waitForOn(Devices.tv.on(), appleTv),
		waitForFullyOn(new ListCommand(asList(
			denon.input(Input.TV),
			denon.volume(50)
		)), denon)
	),
	asList(
		Devices.tv.off(),
		livingMoodTop.off(),
		waitForOff(homeTheaterTv.off(), Devices.tv)
	)
);
Here the scenes are split in two. The homeTheaterBase is the basis for all different home theater scenes: e.g. the one for the Apple TV is displayed here, or the one for Blu-ray. It also allows me to switch from one to another without turning everything off.
As you can see lots of commands are dependent on each other, so devices have to wait for some other devices before starting up. The most obvious case is that you first have to turn on the power before you can turn on the device itself, or give the device more commands.
The receiver has a special qualifier waitForFullOn: this is because it has two stages of powering on. Firstly CEC reports it’s turned on (this is the normal on-state) and later the API reports the powered-on status as well (the full-on-state). We’re interested in both of them as it’s not possible to send any commands through the API before it reaches the fully-on-state.
Time for a quick demo:
Note: as this is the demo, the launch takes a bit of more time then usually. Please be patient 🙂
There is one thing left to integrate: Plex! This will be the subject of part 3.